The Complete Wholesale Workflow: From Die-Lines to Production, QC & Pallet Shipping
2026-01-14 02:08:25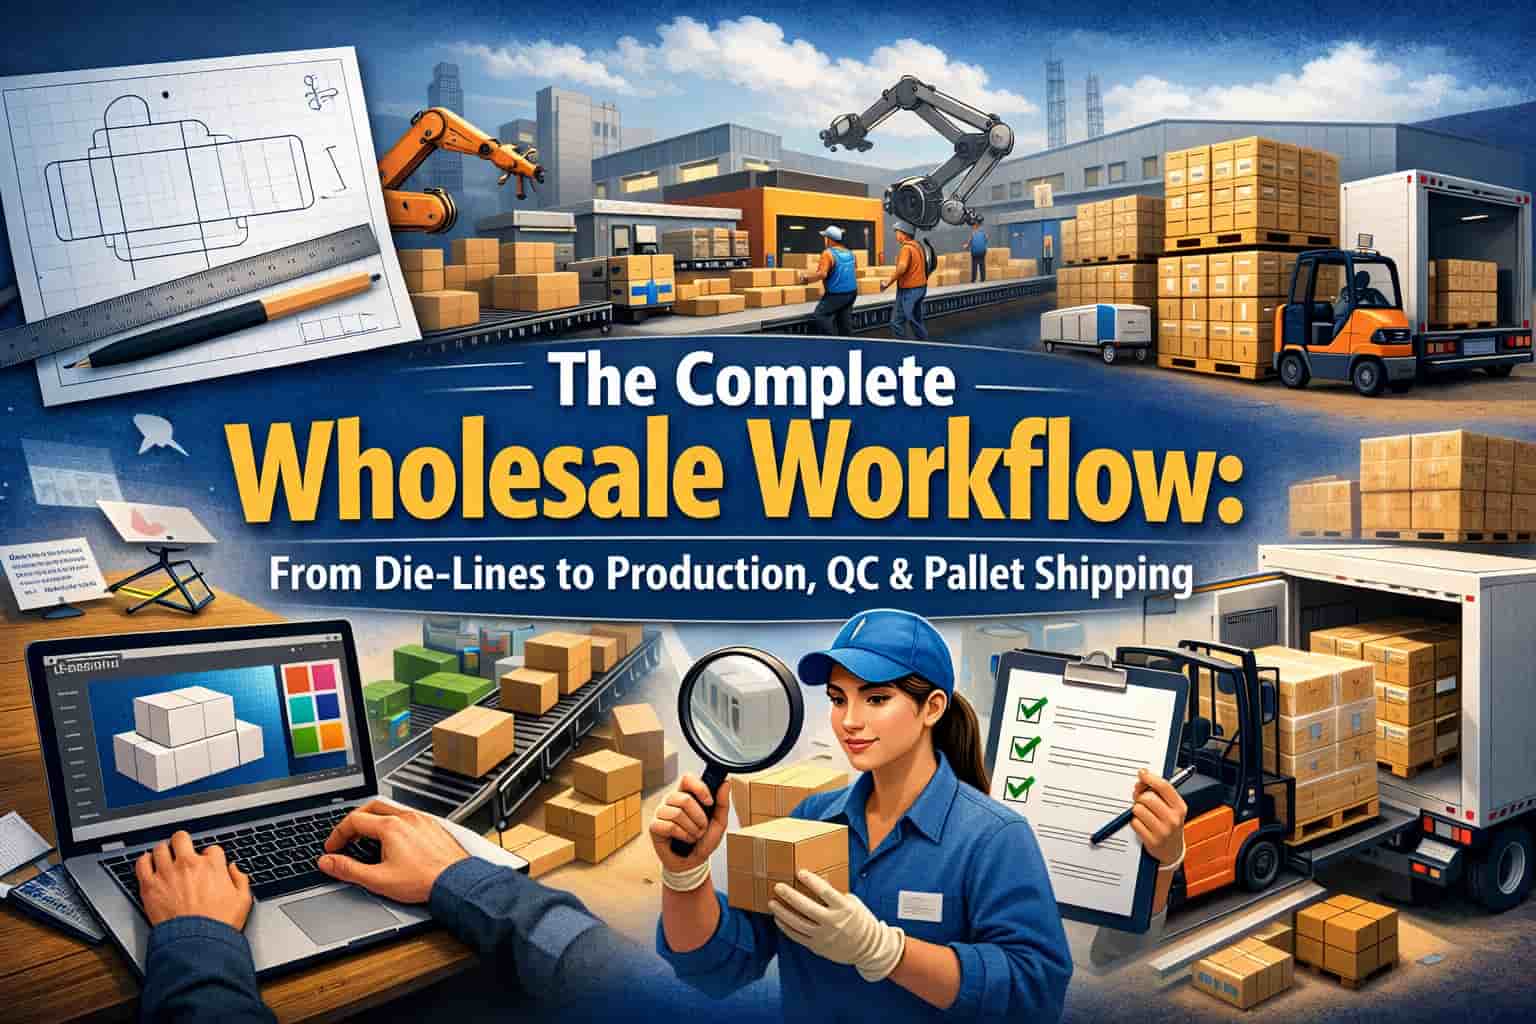
The Complete Wholesale Workflow: From Die-Lines to Production, QC & Pallet Shipping
You can’t run wholesale packaging on guesswork—you lock in die-lines, specs, and timelines before anything hits production. You approve proofs with a checklist so copy, barcodes, and layouts don’t drift. Then you freeze materials, MOQ, and tolerances, and you set QC checkpoints that catch issues before they reach a pallet. Finally, you build pallets that ship clean, with labels, counts, and freight docs aligned—unless one small miss derails everything…
Main Points
- Map the wholesale pipeline with milestones, realistic lead times, buffers, and weekly reviews to prevent stalled deals and missed ship dates.
- Validate dielines and packaging specs for structure, dimensions, materials, finishes, print method, barcode zones, and compliance text placement.
- Approve proofs at actual size, confirming content accuracy, legibility, safe zones, bleeds, folds, glue areas, color settings, and documented sign-offs.
- Lock production specs in writing across PO, spec sheet, and factory quote, including materials, tolerances, MOQs, price breaks, and substitution rules.
- Book freight with matching BOL and packing list, confirm appointments and accessorials, and align pallet/carton labels to prevent receiving delays.
Map the Wholesale Workflow: Milestones and Lead Times
Because wholesale deals move through predictable stages, you can map your workflow by defining clear milestones—lead captured, qualification, terms negotiated, purchase order received, fulfillment scheduled, shipped, and paid—and assigning realistic lead times to each.
Put each milestone in your CRM or tracker, then attach owners, required inputs, and pass/fail criteria so deals don’t drift. Time-box qualification (e.g., 2–5 business days) and negotiation (1–2 weeks) based on your sales cycle, then lock production windows only after you have an approved PO and deposit terms.
Build buffers for vendor delays, holidays, and carrier cutoff times, and publish your ship dates in writing. Review the pipeline weekly, escalate stalled milestones, and update lead times using actuals, not guesses.
Review Wholesale Dielines and Packaging Specs Correctly
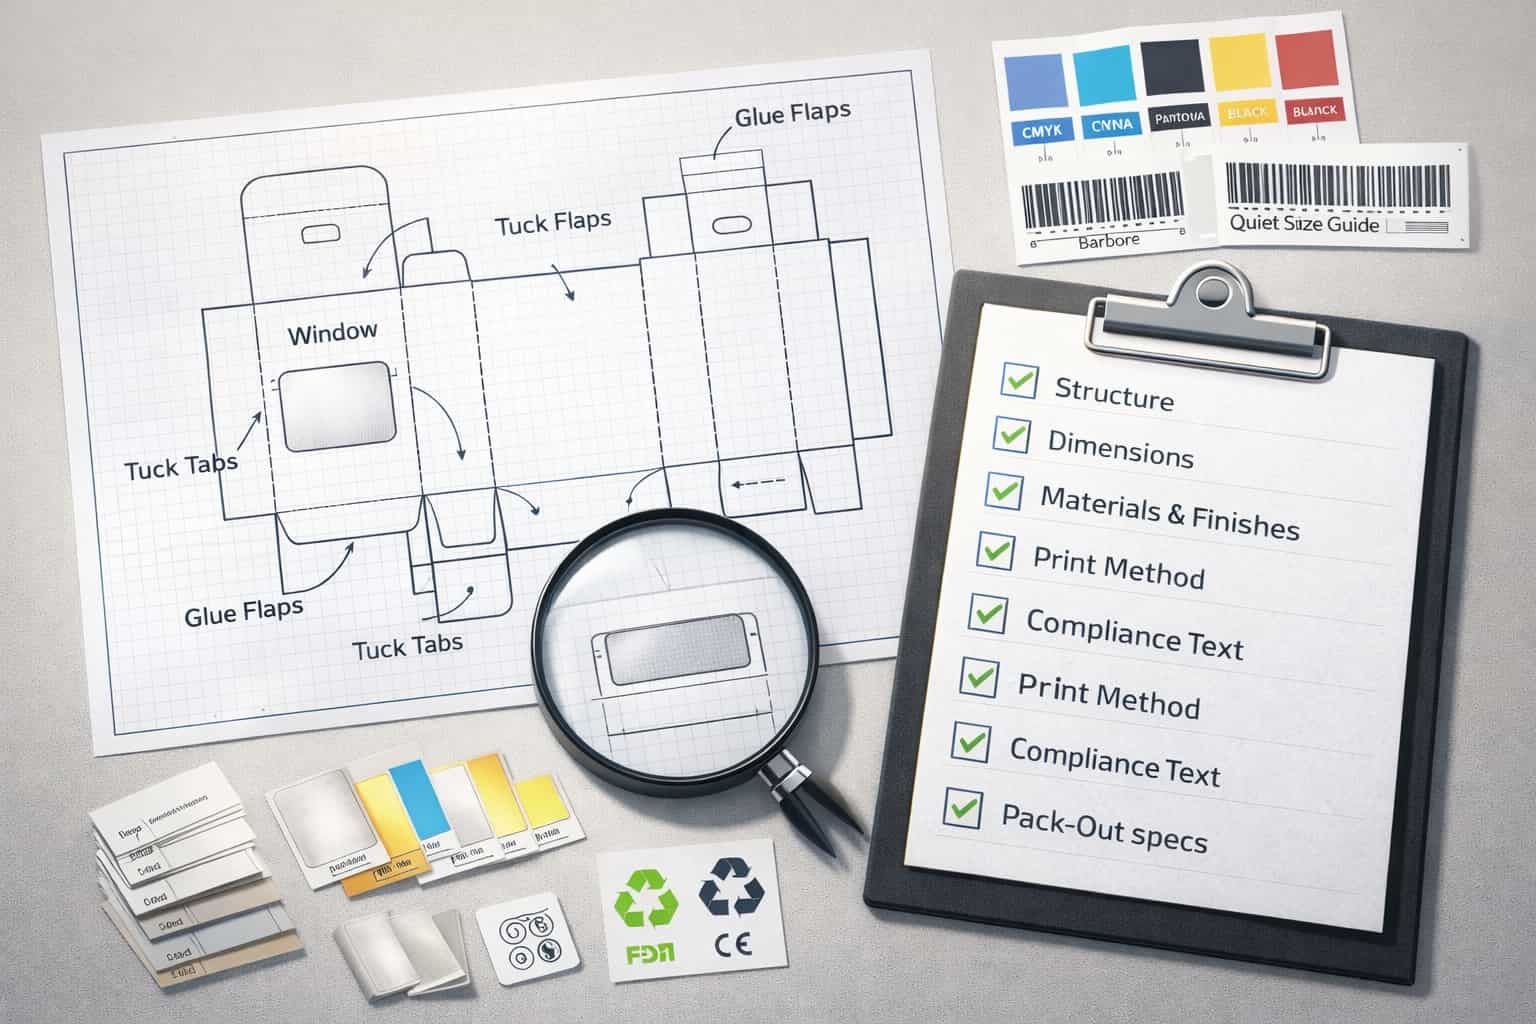
Before you approve any wholesale packaging, review the dieline and specs like a checklist, not a quick glance.
Start by confirming structure: panel order, glue flaps, tuck direction, window placement, hang holes, and any locks or tear strips.
Verify finished dimensions, board caliper, and tolerances so your product fits and carts won’t crush.
Check material and finish callouts—paper type, coating, lamination, foil, emboss, and varnish zones—plus scuff resistance for retail handling.
> Verify material and finish callouts: paper, coatings, lamination, foil, emboss, varnish zones, and scuff resistance for retail handling.
Confirm print method and color requirements: CMYK vs PMS, ink limits, and barcode quiet zones.
Validate legal and compliance text placement, country-of-origin, and recycling marks.
Finally, review pack-out and labeling specs that affect case count, inner packs, and shipper markings for pallets.
Approve Packaging Proofs With a Repeatable Checklist
Once the dieline and specs check out, shift into proof approval with the same discipline: a repeatable checklist that catches print, color, and finishing issues before they turn into costly inventory.
Start with content accuracy: SKU, barcode, net weights, legal lines, warnings, and country of origin.
Verify hierarchy and legibility at actual size, including minimum type, contrast, and key callouts.
Confirm layout: safe zones, bleeds, folds, glue areas, and panel-to-panel alignment.
Check color management: correct spot colors, overprint settings, rich black rules, and image resolution; compare to your approved brand references under consistent lighting.
Review finishes and special processes: foil placement, emboss/deboss registration, varnish knockouts, and matte/gloss breaks.
Then document changes, version proofs, and require dated sign-off from stakeholders.
Finalize Wholesale Production: Materials, MOQ, Tolerances
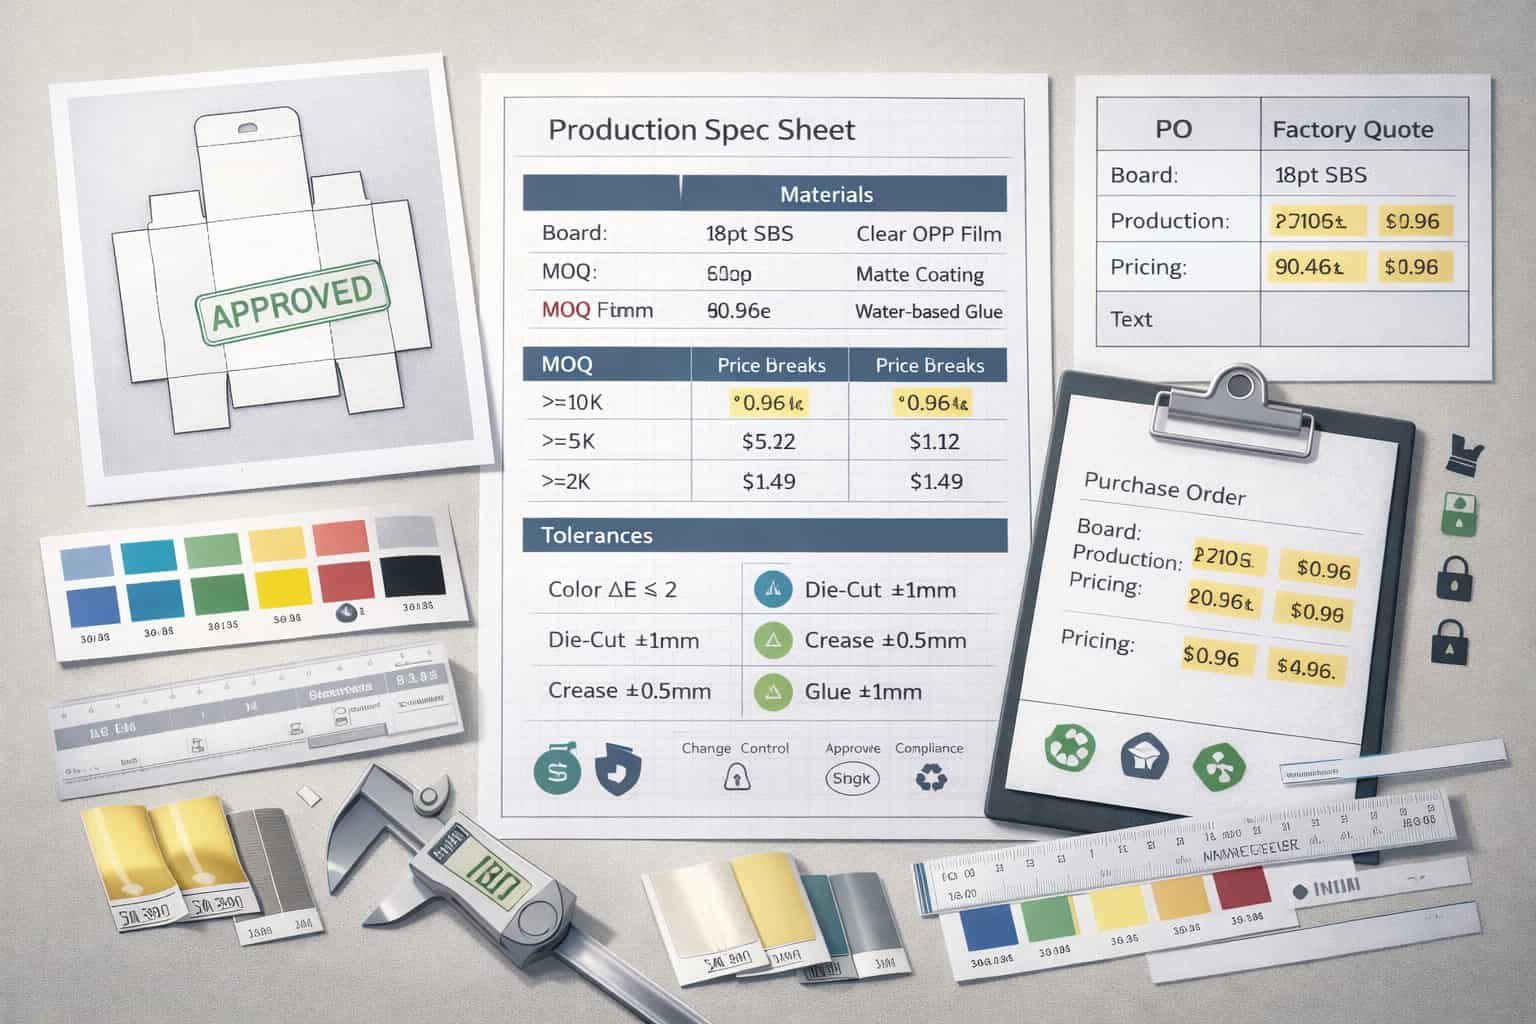
After you’ve locked the proof, you need to translate that approved file into production terms your vendor can’t misread: exact materials (board, film, coatings, adhesives), the MOQ and price breaks that actually match your demand plan, and the tolerances you’ll accept for color, registration, die-cut, and finishing so “within spec” doesn’t still look wrong on shelf.
After proof approval, translate files into production specs—materials, MOQs, price breaks, and tolerances—so “within spec” still looks right on shelf.
Lock it down in writing so your PO, spec sheet, and factory quote all say the same thing.
- Materials spec: call out thickness, grade, finish, and any food-contact or recyclability requirements.
- MOQ + breaks: confirm minimums per SKU and how pricing changes at each quantity.
- Tolerances: define acceptable ΔE, cut/crease variance, and glue or seam placement limits.
- Change control: require approval for substitutions, tooling changes, or process tweaks.
Set Wholesale QC Checkpoints (Pre, During, Pre-Ship)
Even if your spec sheet is airtight, you still need QC checkpoints your factory can’t skip: pre-production signoff, in-process inspections, and a pre-ship release that ties back to your approved proof and tolerances.
At pre-production, you confirm BOM, color targets, critical dimensions, and a “golden sample” your team and the factory both sign.
During production, you schedule timed pulls (first-off, mid-run, changeover) and check fit, print registration, adhesives, scuffing, and count accuracy against your AQL.
Log results, photos, and corrective actions, and stop the line when defects trend upward.
Pre-ship, you audit random cartons, verify labeling, barcodes, and packout, and approve shipment only after rework clears and the final report matches your tolerances and approved proof.
Build Pallets: Carton Counts, Labels, and Pallet Patterns
Your QC release doesn’t mean much if the factory changes the packout or builds pallets that don’t match what you approved.
Before they stretch-wrap anything, lock the carton counts, labeling, and pallet pattern so every unit scans, stacks, and survives transit.
Send a pallet spec sheet with photos or a simple diagram, then require a finished-pallet signoff before full build.
- Confirm inner/outer carton quantities, carton dimensions, and gross weights match your approved packout.
- Standardize labels: SKU, UPC, carton # of #, PO, country of origin, and handling marks, all readable on two sides.
- Define pallet pattern: TI/HI, orientation, edge overhang rules, slip sheets, and corner boards.
- Control wrap: bottom-to-top passes, banding rules, and max pallet height to prevent rejects.
Book Wholesale Freight: BOL, Packing List, Delivery Appt
Freight booking is the handoff where paperwork and timing decide whether pallets glide through receiving or sit on a dock. You’ll book the carrier, confirm pickup, and lock in the delivery window the retailer requires.
Start with a clean BOL: shipper/consignee, PO, NMFC, freight class, pallet count, total cartons, weights, and any liftgate or appointment fees. Match every line to your carton labels and pallet IDs.
Next, build a packing list that mirrors the PO: SKUs, units per carton, carton ranges, lot codes, and pallet breakdowns. Email both docs to your 3PL and the carrier before pickup.
Then you’ll secure a delivery appointment, share dock hours, and confirm accessorials so the driver isn’t turned away.
Frequently Asked Questions
How Do I Choose Between a Broker, Distributor, or Direct Retail Relationships?
Choose a broker if you need introductions and sales coverage; choose a distributor if you want logistics, warehousing, and faster scaling; go direct to retailers if you can manage outreach, terms, and fulfillment yourself.
What Payment Terms Are Typical, and How Can I Negotiate Them?
Typical terms are Net 30, Net 60, 2/10 Net 30, or upfront for first orders. You can negotiate by offering discounts, shorter lead times, credit checks, deposits, or volume commitments. Start small, then extend.
How Should I Handle Chargebacks, Compliance Fines, or Vendor Deductions?
You should dispute quickly, document everything, and track deductions by PO. You’ll require deduction codes, backup, and deadlines in your terms. You’ll fix root causes, negotiate caps, and set a reserve for exposure.
What Insurance Coverage Do I Need for Wholesale Inventory and Shipments?
You’ll want commercial property for inventory, inland marine/cargo for goods in transit, general liability, product liability, and workers’ comp if applicable. Add contingent cargo and warehouse legal liability, plus excess/umbrella, as needed.
How Do I Set Wholesale Pricing to Protect Margin After Fees and Promos?
Start with your target margin, then back into wholesale price from your true landed cost. Add allowances for chargebacks, payment terms, promos, and freight. Use a pricing sheet, test scenarios, and renegotiate annually.
Final Thoughts
When you run a complete wholesale workflow, you reduce surprises and protect your margins. You start by mapping milestones and lead times, then you confirm dielines and packaging specs before anything moves forward. You approve proofs with a repeatable checklist, lock materials, MOQ, and tolerances, and set QC checkpoints from pre-production through pre-ship. Finally, you build pallets with clear labels and patterns, then book freight with accurate BOLs and packing lists.